Leap IT’s Journey of Installing Starlink Internet at a Customer’s Home to improve internet within 1 day
26 Oct
Introduction
Leap IT, a renowned IT service provider, recently undertook the task of installing Starlink Internet at a customer’s home. This blog post will walk you through our process, demonstrating our commitment to delivering high-quality, reliable internet services. This customer was stuck with 4mb internet in 2023, nobody should have to deal with that poor speeds these days, imagine no Netflix!!
In today’s fast-paced world, a reliable internet connection is non-negotiable. But what happens when you find yourself in a village with no internet? Fear not! This article unveils the straightforward process of using a starlink to fast-track your internet in remote areas. Join us on this digital journey, where we break down each step to ensure you’re never disconnected again.
Step 1: Procuring the Starlink Kit
Leap IT began by purchasing the Starlink Kit from the official Starlink website. The kit includes a Starlink dish, a mounting tripod, and a router – all essential components for setting up the internet connection. The starlink satellite is around the same size as a sky satellite.
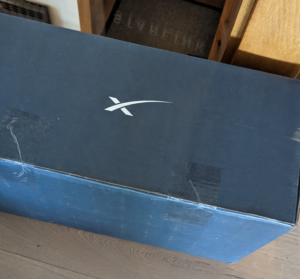
Starlink Box before we start
Step 2: Site Survey and Installation Location Selection
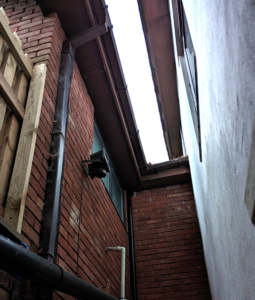
Survey of the locations for the dish and cables on the wall
The Leap IT team then visited the customer’s home to conduct a site survey. The goal was to choose an installation location with a clear view of the sky, as the Starlink dish needs this to connect to the satellites. They ensured there were no obstructions such as trees or buildings that could interfere with the signal. Cabling was hidden best we can.
Step 3: Setting Up the Starlink Dish
Once the ideal location was chosen, the team set up the Starlink dish using the mounting tripod included in the kit. They made sure it was stable and secure to withstand various weather conditions that the UK throw at us.
Starlink on the wall after installation
Step 4: Connecting the Cables
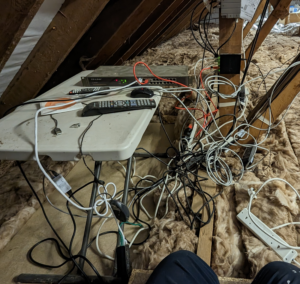
Cable mess to sort out
The next step involved connecting all necessary cables, the photo shows the mess before we started. One cable connects the dish to the power supply, while another connects the power supply to the router making it very clean looking on the external wall.
Step 5: Powering On and Connecting
After all cables were connected, they powered on the system. The dish automatically aligned itself to connect to the satellites. Once connected, they set up the Wi-Fi network on the Starlink router and connected all necessary devices. Due to the shape of the house we installed an additional 4 access points to give fast internet around the home.
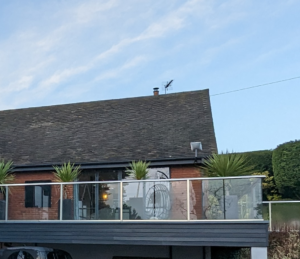
Starlink on the side of the house, after installation
Step 6: Installing and Demonstrating the Starlink App
Finally, Leap IT installed the Starlink app on the customer’s smartphone. This app allows users to manage their connection, check internet speed, and access customer support and troubleshooting tips. They demonstrated how to use this app effectively.
Conclusion
Leap IT’s successful installation of Starlink Internet at a customer’s home showcases our expertise and dedication to providing top-notch IT services. Our step-by-step process ensures that customers can enjoy high-speed internet connectivity from anywhere. The final installation gave an impressive 140mb download and 40mb upload speeds, a massive improvement from 4mb download and 2mb upload they had before.
In the quest for a fast and reliable internet connection in remote villages, using a starlink is the key. Armed with the knowledge from this guide, you’re ready to overcome challenges, troubleshoot issues, and bring the digital world to your doorstep. Embrace the power of connectivity and unlock limitless possibilities.
FAQs (Frequently Asked Questions)
Q: Can I use any starlink in my village?
Certainly, but it’s crucial to choose a starlink compatible with your village’s specific conditions. Consider factors like terrain, weather, and existing networks.
Q: How long does it take to set up a starlink?
The setup time varies, but with proper preparation, it can be done within a few hours. Our guide expedites the process for a quicker connection.
Q: Are starlinks expensive?
While there is an initial investment, the long-term benefits outweigh the costs. We explore cost-effective options without compromising on quality.
Q: Can I use a starlink for personal and professional purposes?
Absolutely. Starlinks are versatile and can cater to both personal and professional internet needs.
Q: What if I face technical difficulties during setup?
Our troubleshooting guide covers common technical difficulties, ensuring you overcome any hurdles in the setup process.
Q: Are starlinks sustainable for long-term internet usage?
Starlinks are designed for durability. Discover how to maintain and optimize your starlink for sustained, long-term internet access.